Sunday, May 26, 2013

New Guages

It has been awhile since I updated the blog so I thought I would show some of my progress and some pictures. We have been camping all over in the Bus and just love it!
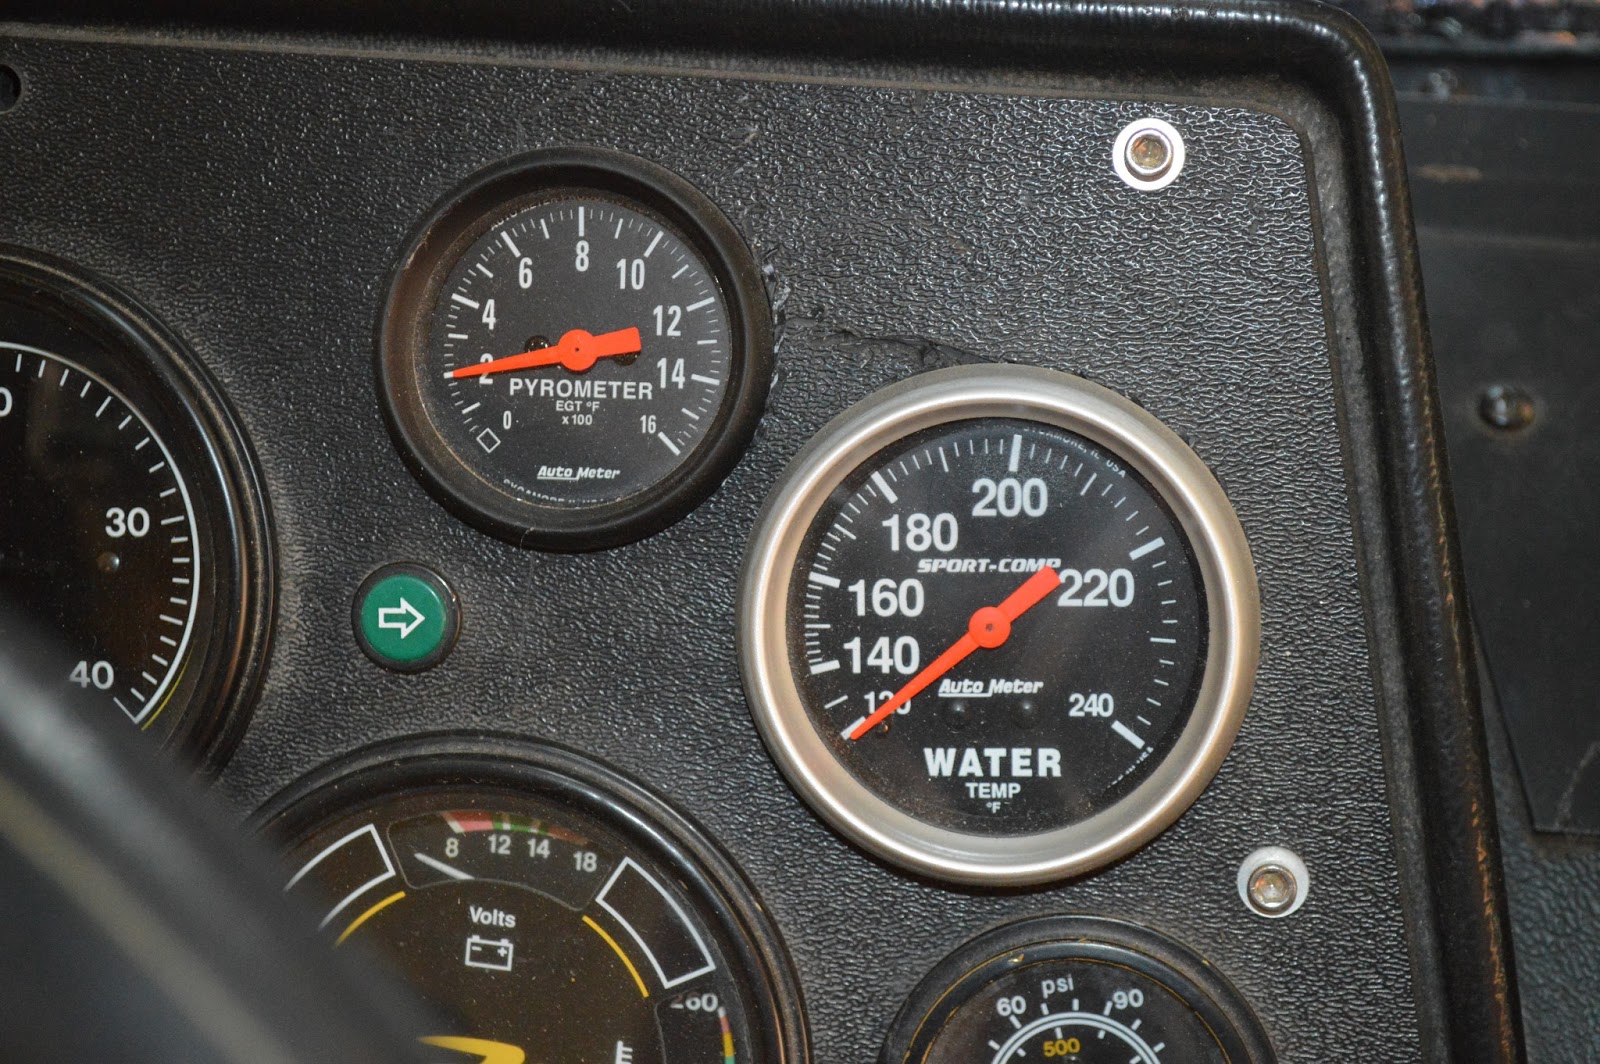
 Here are two of the new gauges that I added last year. These have worked out great and given some peace of mind to what is going on in the engine.

On the right side of the Cummins engine is a threaded plug that I used for the temperature probe. I did have to remove the alternator, but that was the toughest part of the install.
Here is a view looking up from the ground. This where I installed the exhaust Temperature probe. You will notice my first attempt of getting the probe directly in the middle of the exhaust manifold, this was a fail... There is a rib that runs right down the middle and I was able to hit is dead on.

There are more to come shortly...


Wednesday, March 21, 2012

How to secure your bus from your standard 8-12 year old trespasser

One of the challenges I have faced building the bus has been trespassers. I’m not talking about crack heads trying steal the copper wiring to sell for their next fix. I am talking about your standard 8 to 12 year old trespasser. How do I know I have had an unauthorized entry? Remnants of a clandestine Barbie party, a blanket and pillow spread out on the couch and the TV left on. All these are tell tell signs of someone breaking into the bus. But the straw that broke the camel’s back was one afternoon I came out to work on the bus and the door was left open, and the neighbor’s cat was snuggled up on my bed just a purring away. I knew something needed to be done.
Please understand that I have built the bus for the family and I don't want to deny my kids from using the bus. To be honest I have used the bus as an escape pad when the house is loaded with family and I just need a quite place to have a soda, lay down for a bit and catch a movie. But I draw the line at neighbor cats.
And I should be clear that I am not fooling myself that this lock will keep out those that really want to get inside. I know my 8 year old daughter could take a wrench to the door keeper bar and get in if Barbie was in danger. And I know if given the chance my my twins would break out the cut off wheel and make quick work of that eye bolt to gain access. This is just slowing down the honest.

 The next project that I have been working on was some lighting on the floor. Using the halogen ceiling lights are great but when it is dark and those go on it can be quite a shock so I set up some LED lighting under the bunks. This will work great while traveling at night and when you just need to see where you are walking when everyone is asleep.
The next trip we take is going to be to the Easter Jeep Safari so I have been working on getting the bus set up to flat tow the Jeep. One of the challenges was the exhaust was exiting the bus right out the back bumper and would blow diesel exhaust on my Jeep while being towed. So my solution was to move the exhaust and help the engine breathe a little better so I now run a straight pipe out the side. The performance is a little better and I would be lying if I didn't say it really sounds great.
The last update was to a problem with the height of the bed in the back. When I was in bed I was even with the windows. The light is great but it was like sleeping right next to your front window so a little privacy was in order. I just used some of the left over aluminum from my window blanks and painted the outside black and the inside white with an edge cover over the top so it finishes off the top nicely. These windows will have drapes, just haven't got to them yet.

Tuesday, January 3, 2012

Yes it has been a while, but baby it's cold outside

It has been a long time since I have updated the bus build and I have been working on the bus, just not at the pace I had last summer. There are a couple large pieces that I have been contemplating and trying to figure out before I commit and start cutting holes in the bus. The water system is started and I have a 200 gallon water tank installed under the bed (pictures to come) and I have the furnace installed. The furnace was a scarry project. I had to cut a 16" x 9" hole in the side of the bus.
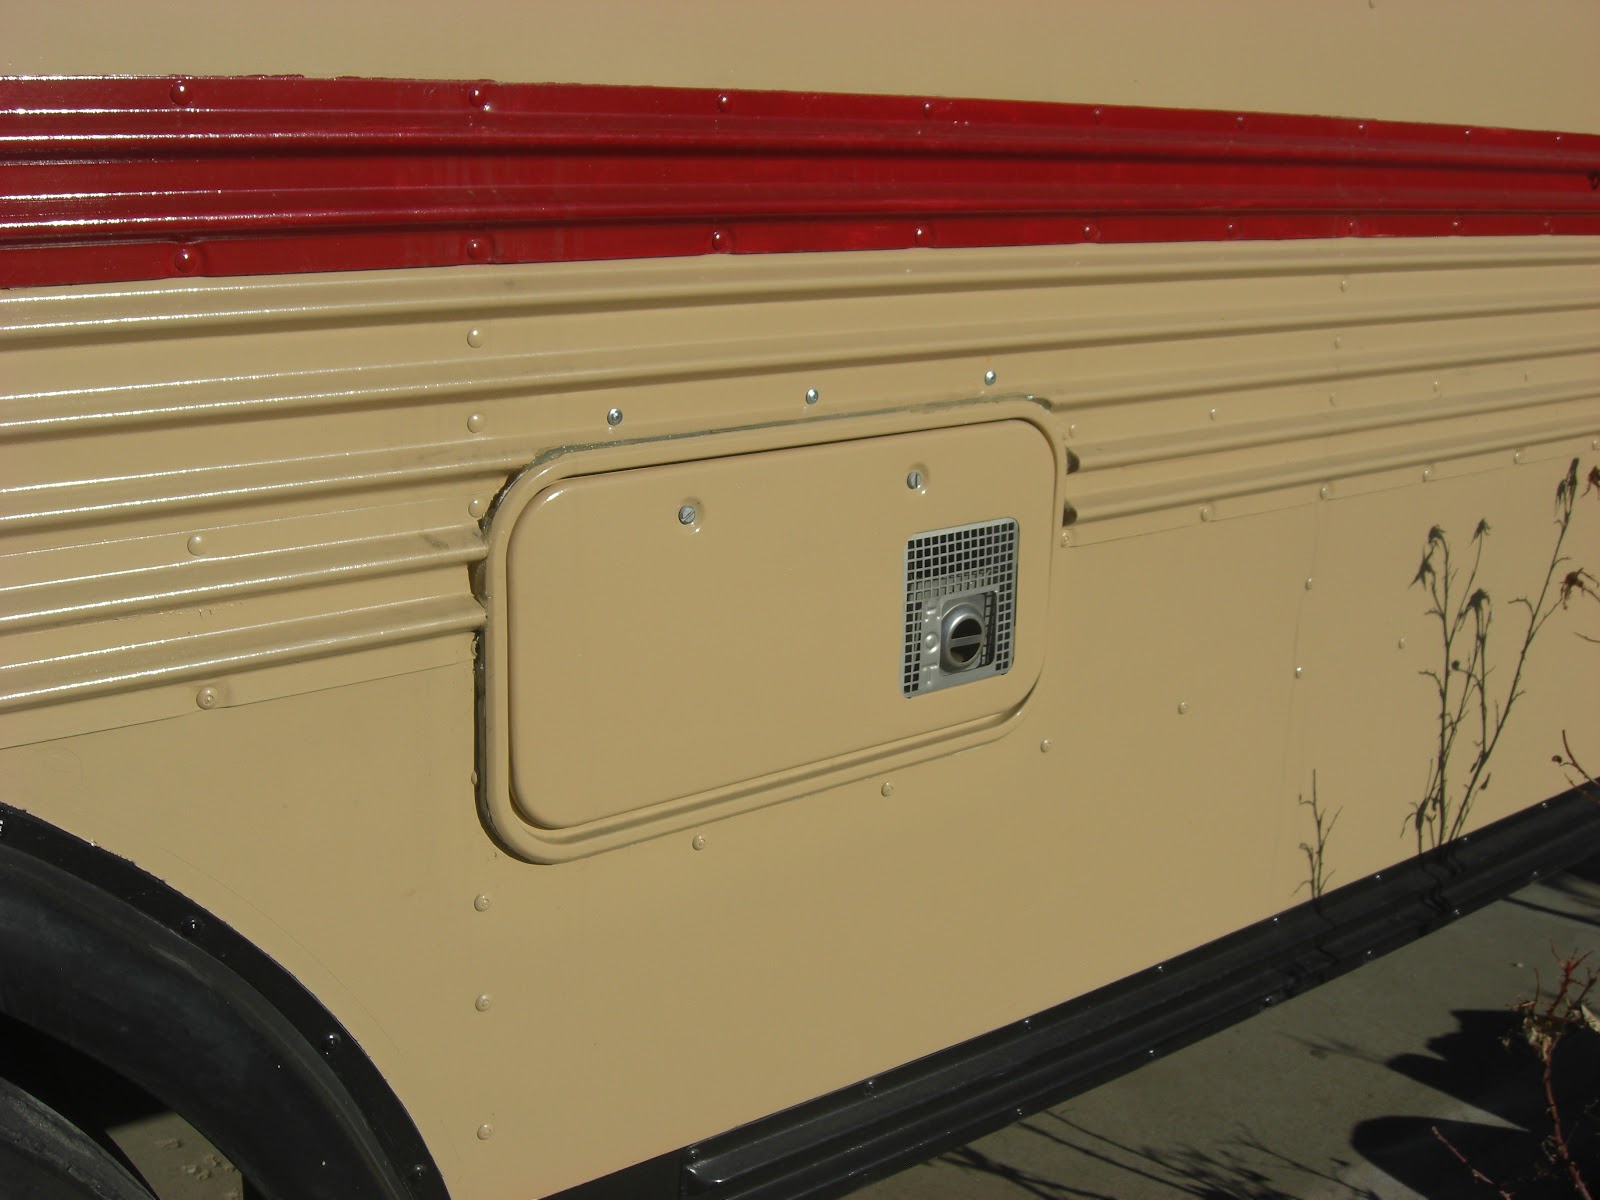
I took all day to make sure I didn't make the hole too large and I am very happy with the install. I painted the ouside door of the furnace the same color as the bus so it looks like it belongs there.


A couple months ago I found a seat on the surplus page I found my bus. It was new and in two pieces with limited information but I waded in and bid $13.50. I won the seat and put it in the drivers spot and really like the way it feels when driving.
   The driving position is really good and getting in and out quite a bit easier.

Another quick project I took on was one Saturday at Lowes they had a open box of cherry wood flooring for $18. I jumped on the box and installed it that day. I was really happy with how it turned out.


Sunday, August 7, 2011

Lipstick on a pig

It has been awhile since my last post but I have been busy camping. I have been working on a few things. When I painted the front of the bus I thought it would look good with an orange pinstripe. Later I thought it would look good pinstriping around the red stripes. Like putting lipstick on a pig. 

 Well 240 feet of pinstripe later I realized it was a bit more then I was expecting. But the bigger story by far is how much we have enjoyed camping.

We have been able to go on three camping trips this year. The first was to Pineview Reservoir. The last two were Lava Hot Springs in Idaho.
Lava was wonderful and I was able to work on our "speed issues". What I have learned was that the bus was set up to keep the maximum rpm's to 1,800. So the top speed was right around 53 -55 mph so there was some changes were needed. Working with Scott Geoff from Geoff Injection I was able to move the pivot point on the accelerator so the throttle now has full range and increased the RPM to 2,300.  Then Scott showed me how to move the throttle plate forward increasing the fuel.
For our latest trip we traveled north to Liberty Utah for a couple of days of camping. The drive up to Liberty was much better with a speeds topping a very acceptable 65 mph. The camp was a great experience and we found a couple things that we want to change and more things that we just loved about camping in the bus. We are now getting ready for next weeks three day camp to Smith and Morehouse. Smith and Morehouse Campground is located just 12 miles south of Oakley, Utah, adjacent to Smith and Morehouse Creek and Reservoir at an elevation of 7,800 feet.


Sunday, July 10, 2011

Almost There!

I have made some headway this past few weeks on the bus. Deciding what to do next has been tough but I made the decision I would really like to get the outside finished up as much as possible.
We first painted the middle rib red and immediately knew it needed another stripe, so one more red stripe was put into play.

My next door neighbor Mel, who so kindly shares her driveway with me, made me some drapes. I must say that the quality of these curtains are beyond compare.  
I also found some window screens at Lowe's and Wal Mart that fit the windows. At less then $5 a piece you just can't go wrong.
We are going camping in two weeks so I have turned my attention to the bunk beds. I chose to "over build" these bunks. I am using 1/4" steel and they weigh about 150 lbs. Each one will hold just about any adult and any kid I know!

Sunday, June 26, 2011

Like Titanic... only different

Made some great headway on the bus in the last couple weeks. We had the maiden voyage of the bus two weeks ago and went camping. This was a great opportunity to see how everything worked and changes we want to make before everything is finished. Unfortunately my camera skills are somewhat lacking and all the pictures I took while camping were set at a half meter focus... yeah, gonna look at that setting next time I take some pictures.

I decided that I was going to give the top of the bus two coats of roof sealant to help with heat and put a good seal on the roof. The required me on top of the bus a number of times and a rounded metal roof is just the recipe for disaster. Luckily my deft footwork surpasses my camera technique and I am happy to report no injuries.
While rolling the paint on top of the bus my oldest son was taking pictures. He yelled up at me.."Dad go to the front of the bus and do that scene from Titanic where she is on the front of the Titanic." So I go to the front of the bus and did my best Kate Winslet. As soon as he snapped the picture he said, "You're such a dork."
Well I guess I learned my lesson.
I won't lie this was a tough job but I know if I took my time and did it right I would not have to be up here again so I made the best of is and the comments that came my way.
* Looks like a prison bus.
* Is that bus from the Afghanistan conflict?
* If I had a big yellow bus I would paint it flesh color also.
Saturday was the big day to get the bus all the same color. During the week and late into Friday night we scuffed and masked the monster. It took about two hours and 1 1/2 gallons of paint to get the mono chromatic theme completed.
So this is the final base coat. Now I can work on an accent stripe and putting the front of the bus back together. We have camps planned in three weeks so I need to get the inside in a "working" order.


Saturday, June 4, 2011

Ricky and Lucy's Bedroom

Finished building the rear bed platform today. The goal was to build a rear king size bed but we couldn't fit a king size mattress through the back door, so we went ala Ricky and Lucy with two twin beds.
The cabinets were finished and attached on the right side of the bus this week. I won't lie, fitting the top cabinet was a challenge but I am really happy with how it turned out. This gives us plenty of storage now.
Before I could build the rear platform I needed to finish the rear lights. Early on I knew I was going to lose the big bus lights. Using LED lights take less power, are brighter and look much better. To get them to look right I had to weld in some holes and cut and space the lights so they looked right.
You can now see the outside color for the finished project.
This next week we are going camping. It will be a good shakedown for the bus and see how everything works so far.
Hope we don't freeze....

Sunday, May 22, 2011

Spring Progress

I firmly believe that I got much more done on the bus when it was 20 degrees outside. Now that spring is here that means warmer temperatures and the beginning of kids organized sports, and I use the term organized very loosely. For the past month my Saturdays have been consumed by watching pre-pubescents chase balls of differing sizes is an air of semi-organized chaos. Great for them to get the energy out and run around, but it seriously hampers production on the bus.
All that being said I have been able to steal a few hours here and there to work on the bus so I have made some headway. That coupled with some serious negotiations with the wife I have been given “sports amnesty” for the past two Saturdays. But it was at a considerable cost which will be extracted from me over a drawn out time frame, but still worth it.
I have begun to work on the interior walls and finish up some final wiring and secure the furniture.
I have set up two plugs behind the fridge one is shore power 110v and the lower will run to my 2000 watt inverter. I made the decision a couple months ago to sell the propane/elec fridge and move to a dedicated 110v fridge. Running the two Trojan 6 volt batteries coupled with the new efficiency of the smaller fridge I am hoping for the best.
The passenger side wall was more complicated with all the wiring that runs down that side I had to compensate for the wall thickness, but it turned out pretty good.


The last great step forward was installing the stereo and getting the rear view camera hooked up and working.
The stereo will play DVD's, Ipod, CD's and radio. After manuvering the behemoth a few times I knew I wanted a better view out of the rear while backing up. The voyager color camera works great.


Saturday, April 9, 2011

Two Coats and a Loft

For the past few weeks we have had some seriously awful spring weather. For the last three days it has snowed every day. Today is snowed litterally all day long.

What I have been working on is getting the inside ceiling painted and building a loft for our youngest.
It is really just a bunk but in selling it to my daughter I sold it as a loft so it will now and forever be known as the loft.
What I did was use 1/8 inch 2X2 angle to build the frame then secured it with grade 8 bolts to the frame.

The frame turned out really great and I will use some 3/4 plywood to complete the loft, yes the loft.

Friday, March 18, 2011

Floods


Since my last update I have working on getting the windows finished up. Last Saturday I removed all of the windows and window skins on the right side and cleaned all the 20 year old caulking, let me tell you that stuff does not just fall off. This took a ton of time but now that it is sealed up right I won't have to deal with it ever again.
This took almost a full Saturday.

The next job was to convert the red and amber flashing lights to flood lights that can be used when parking at night or loading and unloading.
First I removed all the flashing light wiring and used two Hella switches that will match the switch for the front auxiliary lights.
Also wanted to set up the rear camera that will be run through the stereo and add the new LED marker lighting.

Saturday, March 5, 2011

Gimme some skin


Today we worked on getting the windows skinned. Originally I had the idea of taking .080 aluminium in large sheets and covering the windows. As I read of other projects I found it better to skin each individual window. This last week I took two 4' by 12' sheets of aluminum to Complex Fab and had the window blanks cut out.

I prepped all the aluminium with primer and put one coat of Rustoleum Hammered Brown. The hammered look will be great for hiding some of the imperfections.

My helper today was my daughter and I could not have done all this without her. Riley helped me take the aluminum blanks and use 1/16" aluminium angle to secure each one in place of the old windows.

The last part of my day was getting the back of the bus painted so I can install the Voyager rear view camera. I am using Black Jack 10 Year White Siliconized Elastomeric Roof Coating. This is after three coats so I will definitely be using a primer when I get to the rest of the roof. You can see the corner of the back where I rolled some of the hammered brown to see how it looks. I am really pleased with the Rustoleum paint.

Something intersting we found out. Each window weighs over 15 pounds and the window skin with the brackets to secure it to the window frame weighs just under 6 pounds. By changing out the 10 windows we will be saving over 100 pounds when you consider two emergency exit windows.

Not that this big girl is watching her weight, I'm just saying...

Monday, February 21, 2011

Like a fat kid attacking a twinkie

Christmas came in February this year!

Three weeks ago I ordered a custome built 36" dinnete and table.


So what do you do when you get your custom built booth home??


You cut it up.

I attacked that booth with a jig saw like a fat kid attacking a twinkie. (I can use this analogy)


The problem with where I am putting the dinette is that there is a big wheel in the way so I need to make some adjustments..


Then I decided to take a swing at the windows .


Saturday, February 12, 2011

More go go juice


Today I worked again on the electrical for the bus. I have run 99% of the wire with just one more line of 110 wire to the rear AC unit.


I am running two 6 volt Trojan batteries. The two batteries were almost as much as I paid for the bus but very well worth the money.


The ability to run deep cycle batteries are a great assett when dry camping. I will also be running a 1000 watt pure sine wave inverter.

I also ran a power line to the storage compartment so I can see what goes bump in the night.